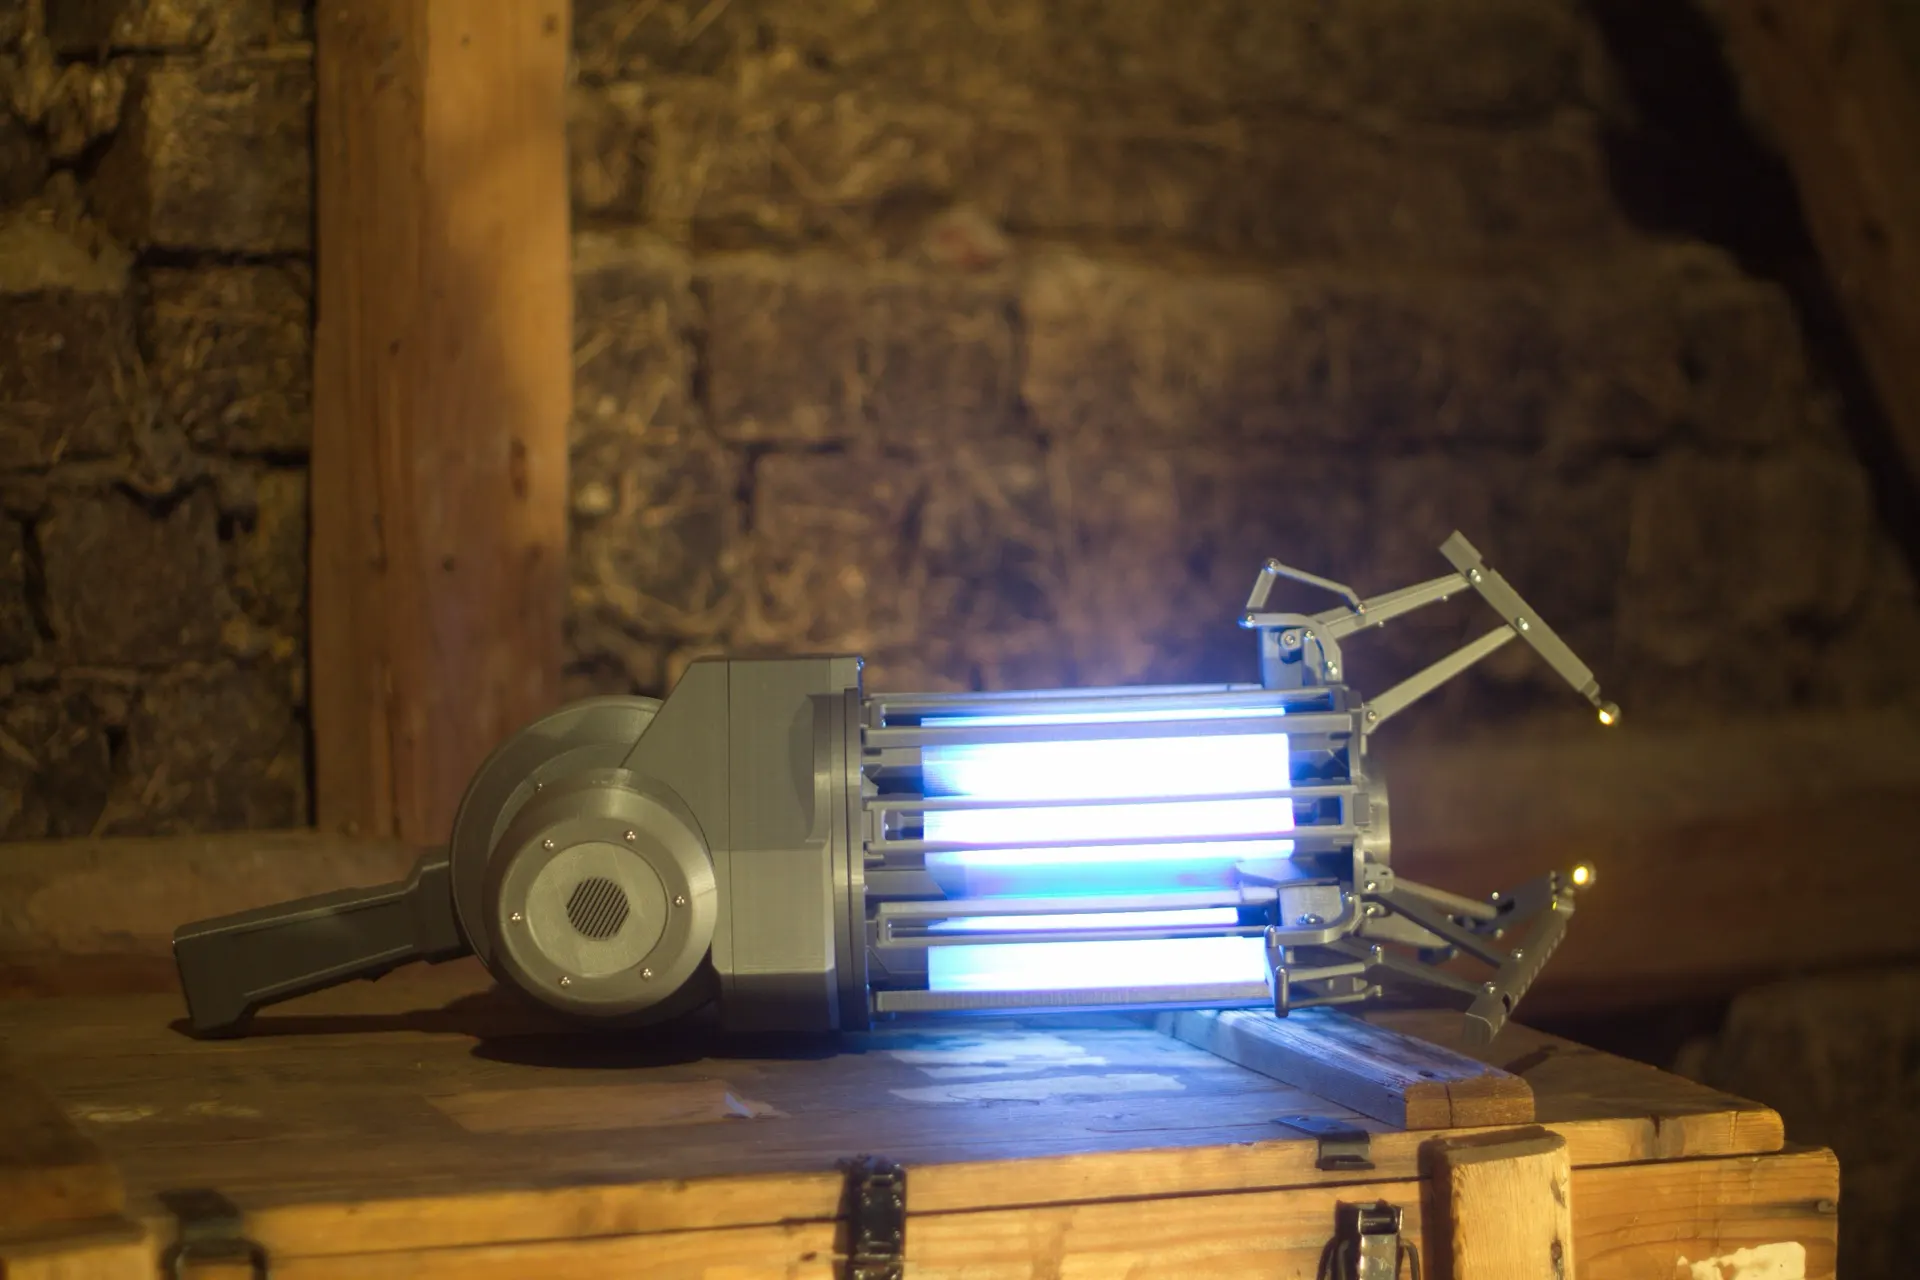
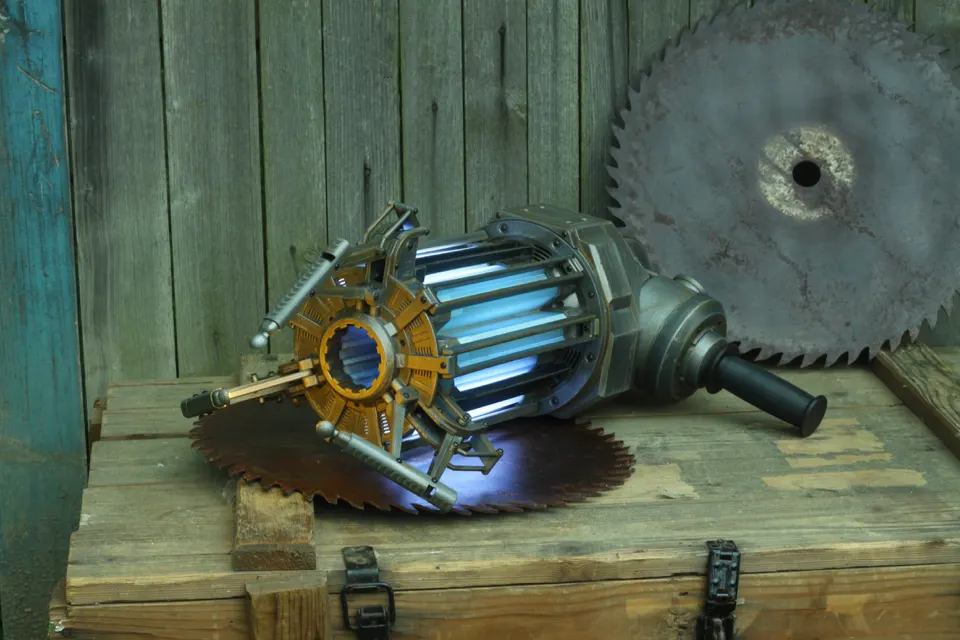
A 72 cm replica of the Half-Life 2 Gravity Gun, designed for the first Maker Faire Prague. 52 unique parts, full STEP sources and an
illustrated assembly guide. Everything but one part prints without supports.
Five parts carry the light: the inner and outer shell, both case light covers and the arm lights. Print them in transparent orange for the gun as you
first find it, or in light-blue PLA for the supercharged version. Everything else is grey PLA; PETG works too.
Anatomy
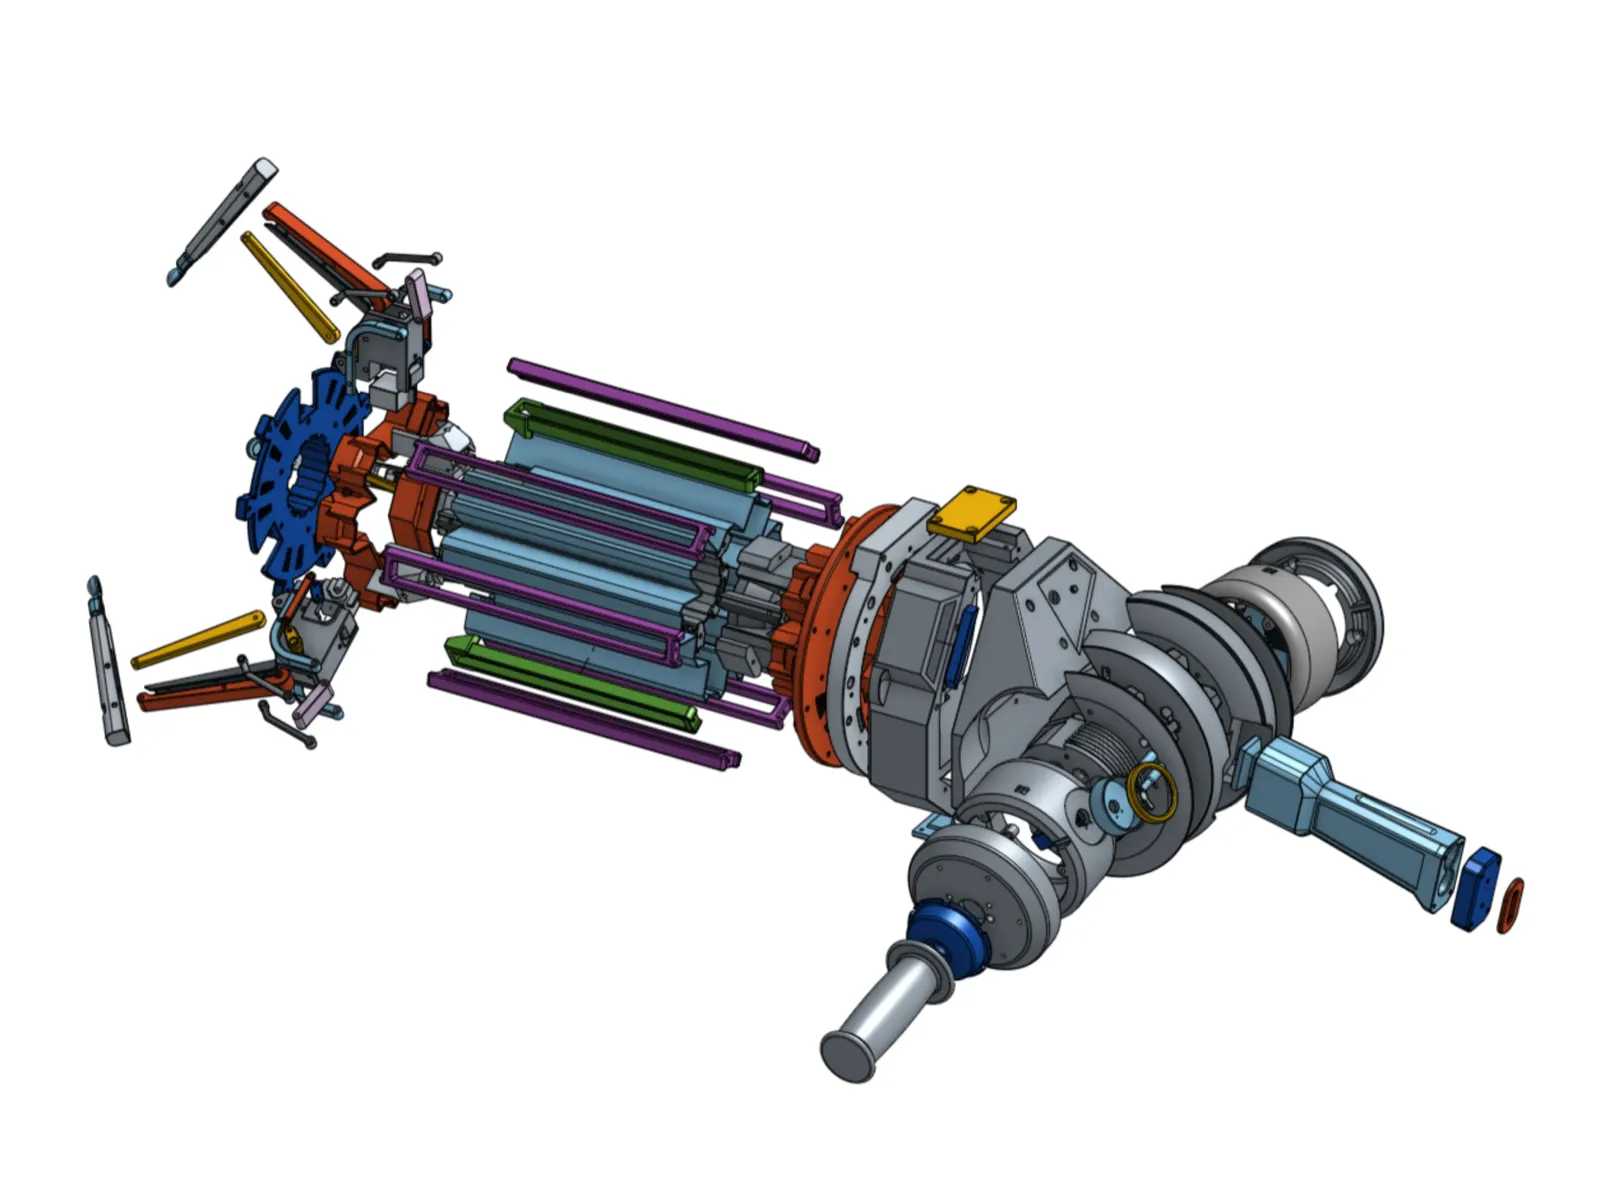
52 parts. 98 prints.
Six sub-assemblies held together with standard M3 and M6 hardware. The claw is a real four-bar linkage, the same one that moved on servos in 2018.
Overall length
72cm
Unique parts
52
Printed pieces
98
Need supports
1
Material
PLAor PETG
Printed on
MK2Prusa
Origin · 2018
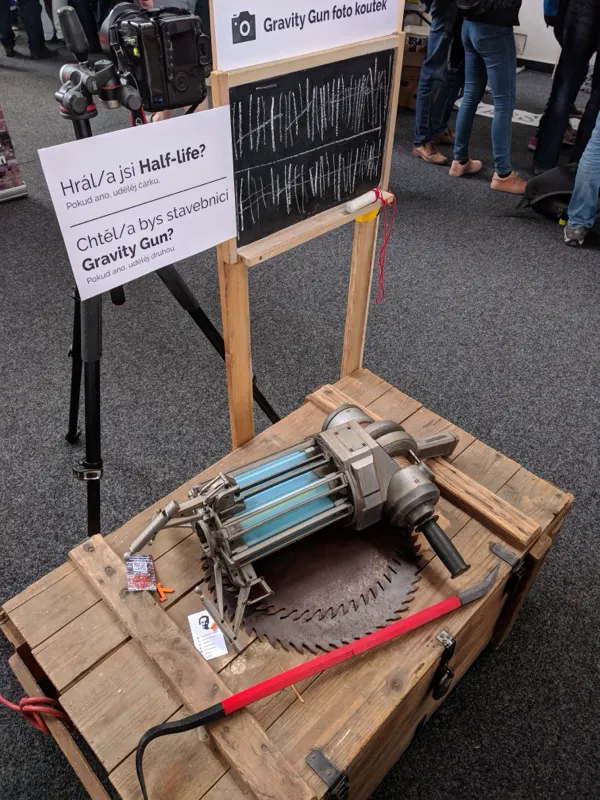
Built for a photo booth.
I modelled the Gravity Gun in 2018 as the centrepiece of my photo booth at the very first Maker Faire Prague. I picked it because it isn’t a typical
game weapon but an anti-gravity device, and a good excuse to learn Arduino, servo motors and LED strips.
The original lit up, moved its arms and made sounds. I left the sparks switched off. For this release I closed the holes for switches and connectors,
replaced the servos with printed dummies and left out a few of the original parts. The electronics aren’t ready to publish yet; the components
and circuit diagrams may follow.
“Not a typical weapon from a computer game, but an anti-gravity device.”
Maker Faire Prague, June 2018
It lit up, moved its arms and made sounds.
Primed, sanded, painted and weathered by hand.
Gallery
From the workbench.
Watch
See it move.
Gravity Gun 3D model previewYouTube · Michal FantaFirst Aid BoxesShort · from the same workshop
Videos load from YouTube (privacy-enhanced mode) only after you press play.
Print guide
From spool to prop.
01
Print
STL files come oriented for printing. Grey PLA for the body, transparent orange or light blue for the five light parts. Only the side grip case gauge needs supports.
02
Assemble
Discs, repro case, case, body, three arms and the side grip case, joined with M3 and M6 screws and nuts. The illustrated PDF walks through every screw.
03
Finish
The gun in the photos was primed, sanded, painted and weathered. Or leave it straight off the printer.
04
Wire it up
STEP files keep every part in its original position, handy for fitting your own LEDs, servos and a speaker into your build.
Assembly guide · preview
Start with the discs.
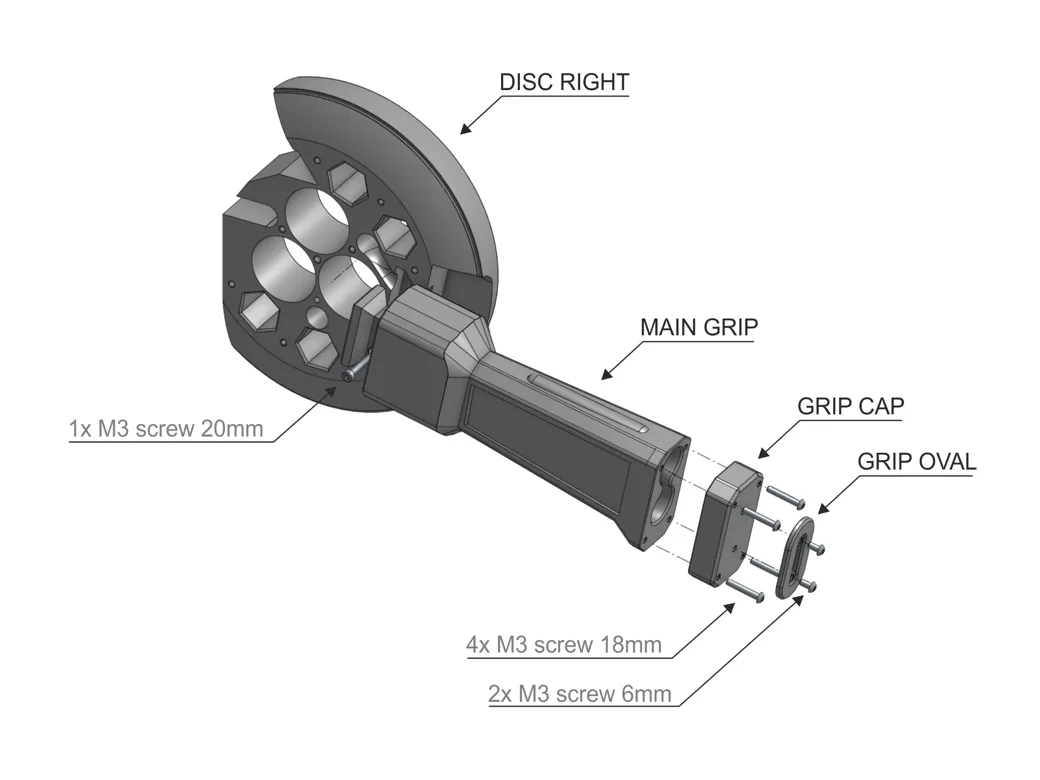
The illustrated guide that comes with the files walks through all six sub-assemblies, screw by screw. Here is the first one.
01
Grip
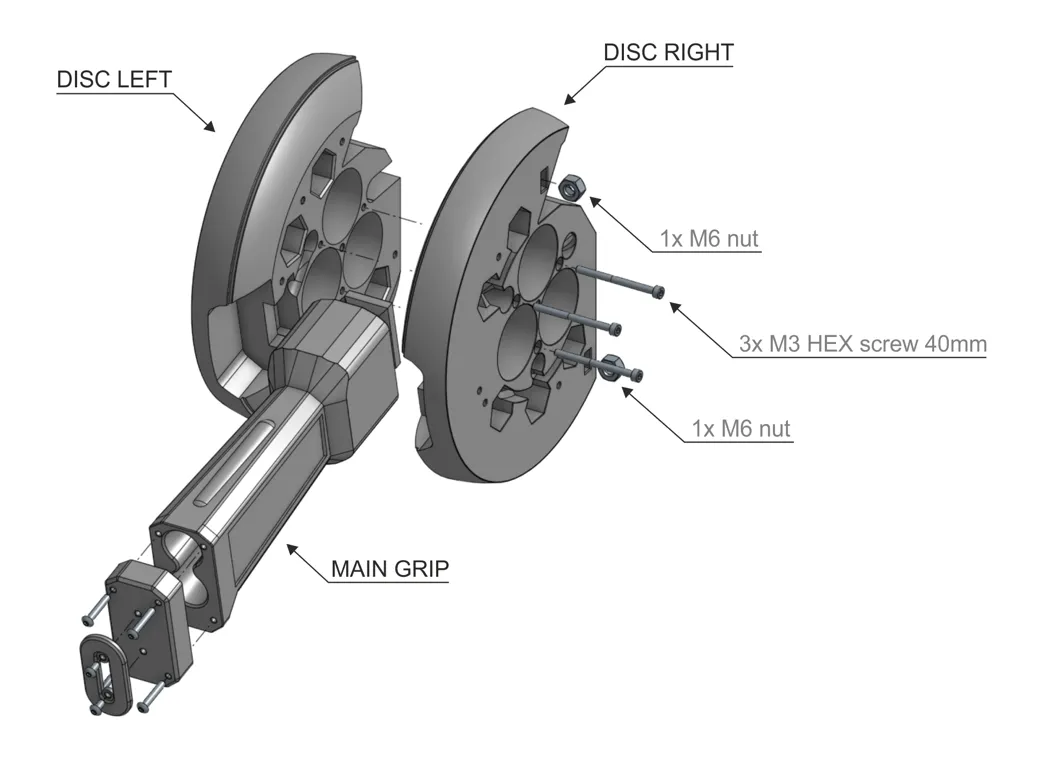
Screw the grip oval to the grip cap, the cap to the main grip, then the main grip to disc right.
2× M3×6 button
4× M3×18 button
1× M3×20 socket
02
Disc left
Press two M6 nuts into disc right (a dab of hot glue holds them), then bolt disc left to it.
2× M6 nut
3× M3×40 socket
03
Right cover
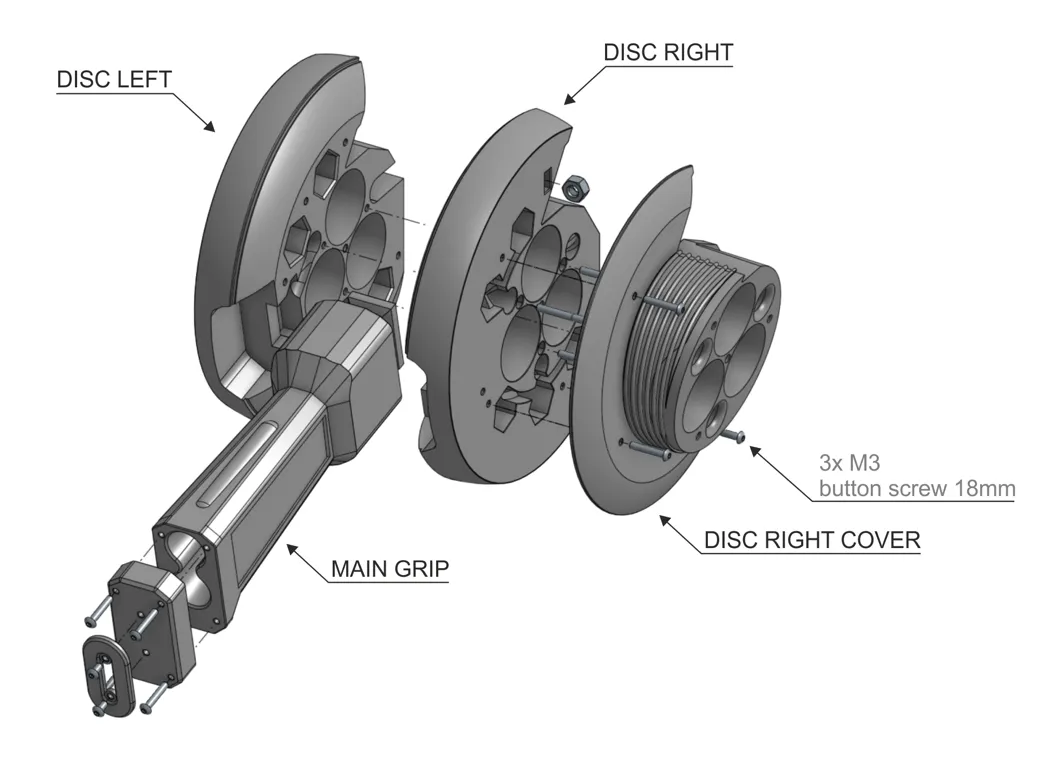
Attach the disc right cover with its ribbed drum.
3× M3×18 button
04
Nuts
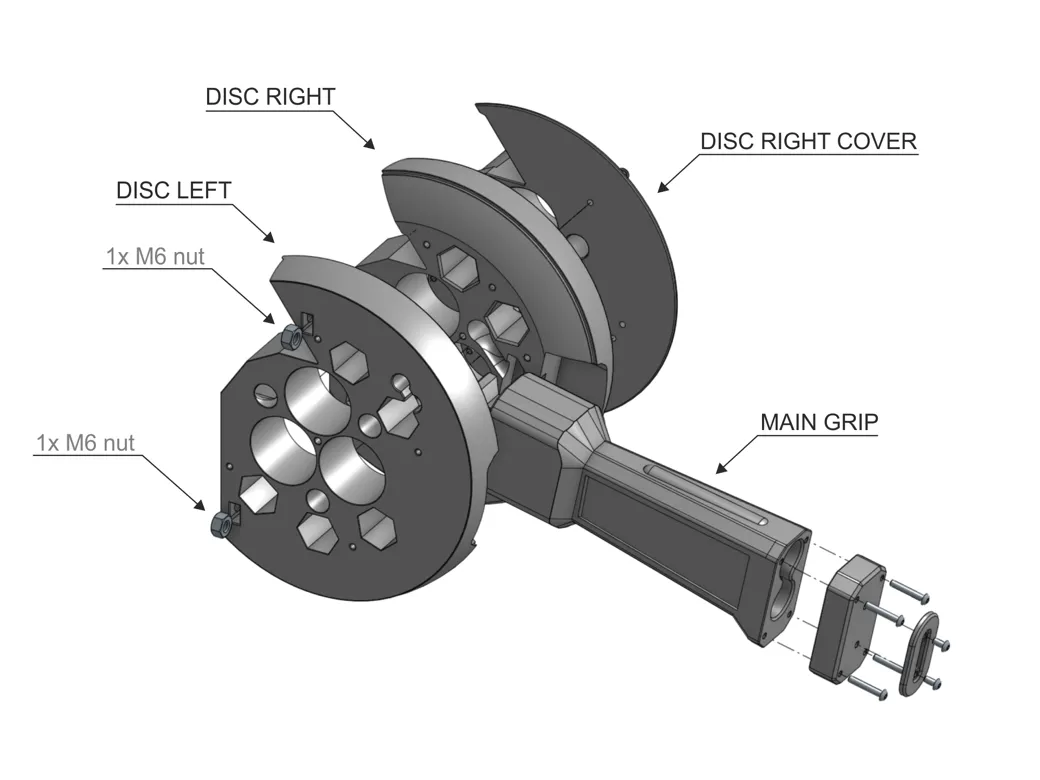
Press two more M6 nuts into disc left. The case rear bolts onto these later.
2× M6 nut
05
Left cover
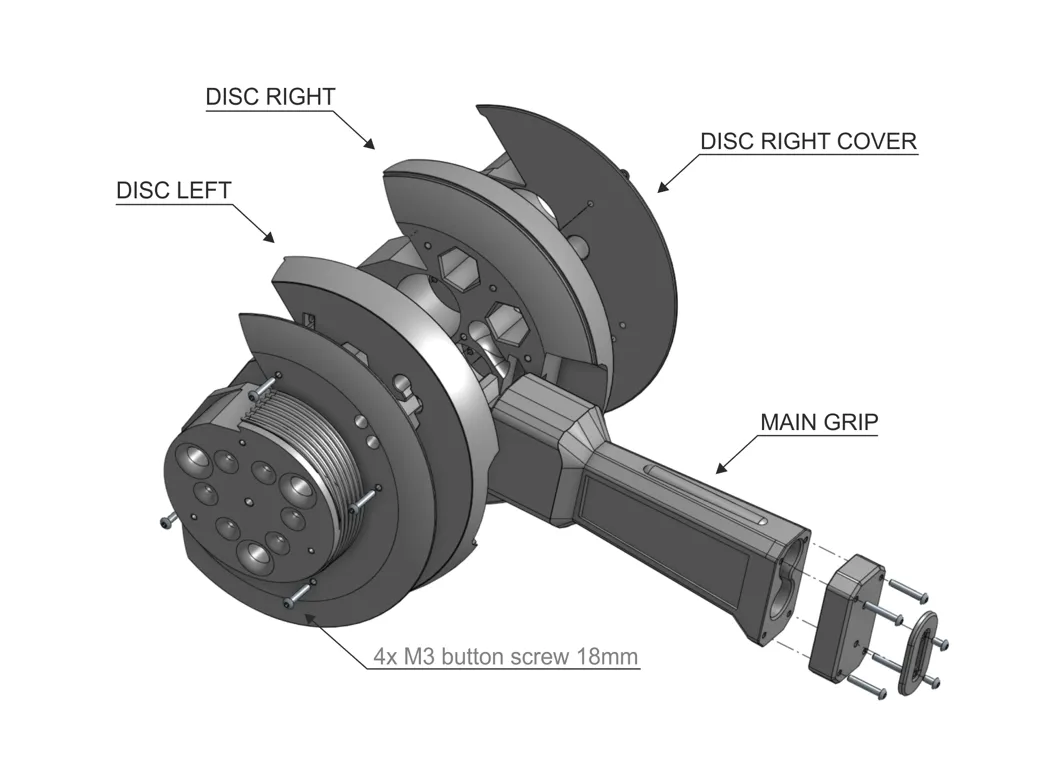
Attach the disc left cover. The discs are done; on to the repro case.
4× M3×18 button
Hardware list
Everything that isn’t printed: standard metric screws and nuts from any hardware store. Button head means ISO 7380, socket head cap means ISO 4762. Counts are rounded up, so expect a few left over.
98screws12nuts
Also keep at hand
~100×M3 socket head assortment, 8–40 mmArm linkages (about 20 per arm), side grip case and repro case mounts
6×623 ball bearing, 3 × 10 × 4 mmArm lever pivots
—Hot glueKeeps the M3 and M6 nuts in their pockets
Screws and nuts needed to assemble the Gravity Gun
Part
Size
Qty
Used in
Button head screw
M3 × 6
2
Discs
Socket head cap screw
M3 × 10
3
Repro case
Socket head cap screw
M3 × 12
38
Case, body, ribs
Button head screw
M3 × 18
11
Discs
Socket head cap screw
M3 × 20
20
Discs, case, arms
Socket head cap screw
M3 × 30
12
Body
Socket head cap screw
M3 × 40
6
Discs, body
Socket head cap screw
M6 × 30
3
Case
Socket head cap screw
M6 × 60
3
Case
Hex nut
M3
8
Case
Hex nut
M6
4
Discs
Black Friday · −70 %
The complete files
$9$29
53 STL files, oriented for printing
59 STEP files: every part and sub-assembly in place
Sold and delivered through Printables.com. The price there is the one that counts.
FAQ
Before you print.
Does it light up and move?
Not out of the box. The original from 2018 had an Arduino, servos, LED strips and sound, but the published parts are the printable shell: switch and connector holes are closed and the servos are printed dummies. The STEP files make it easy to add your own.
How big is it?
About 72 × 42 × 27 cm assembled. Every part fits the bed of an Original Prusa MK2.
Which printer and filament?
Everything was printed on an Original Prusa MK2, so an MK3, MK4 or any printer with a similar bed will do. Grey PLA for the body and transparent PLA for the light parts; PETG should work as well.
Orange or blue?
Orange for the Gravity Gun as you first find it, light blue for the supercharged one. Only the five transparent parts change; try both in the viewer above.
Can I sell prints?
No. The files are under the Printables Standard Digital File Licence: personal, non-commercial use only. No sharing, remixing or selling of the files or printed copies.
Is this an official Valve product?
No. It’s a fan-made replica, designed from scratch and not affiliated with or endorsed by Valve.